
Visual Config Editor
TrendRadar provides a web-based graphical configuration interface. Instead of editing YAML files by hand, you can make all your configuration changes using visual controls — forms, switches, dropdowns, and more — and then export them as config files.
Open it online
The editor is deployed on GitHub Pages, so you can open and use it directly in your browser:
https://sansan0.github.io/TrendRadar/
https://sansan0.github.io/TrendRadar/
What you can edit
The editor supports visual editing of three configuration files:
config.yaml, timeline.yaml, and frequency_words.txt. AI prompt files (such as ai_analysis_prompt.txt) and Docker environment variables (.env) need to be edited manually.config.yaml -- Main system configuration
All the core parameters the system needs to run can be edited here as forms:
- Push mode: choose between "current trending" and "incremental push" modes
- Platform selection: check the trending-list platforms you want to monitor
- Notification channels: configure push methods such as WeCom, Feishu, DingTalk, Telegram, and email
- AI settings: configure the toggles and parameters for features like AI analysis, translation, and smart filtering
- Storage options: configure local storage or S3-compatible remote storage
- Display settings: adjust the format and style of the report output
timeline.yaml -- Timeline scheduling configuration
Manage when and how often tasks run through a visual interface:
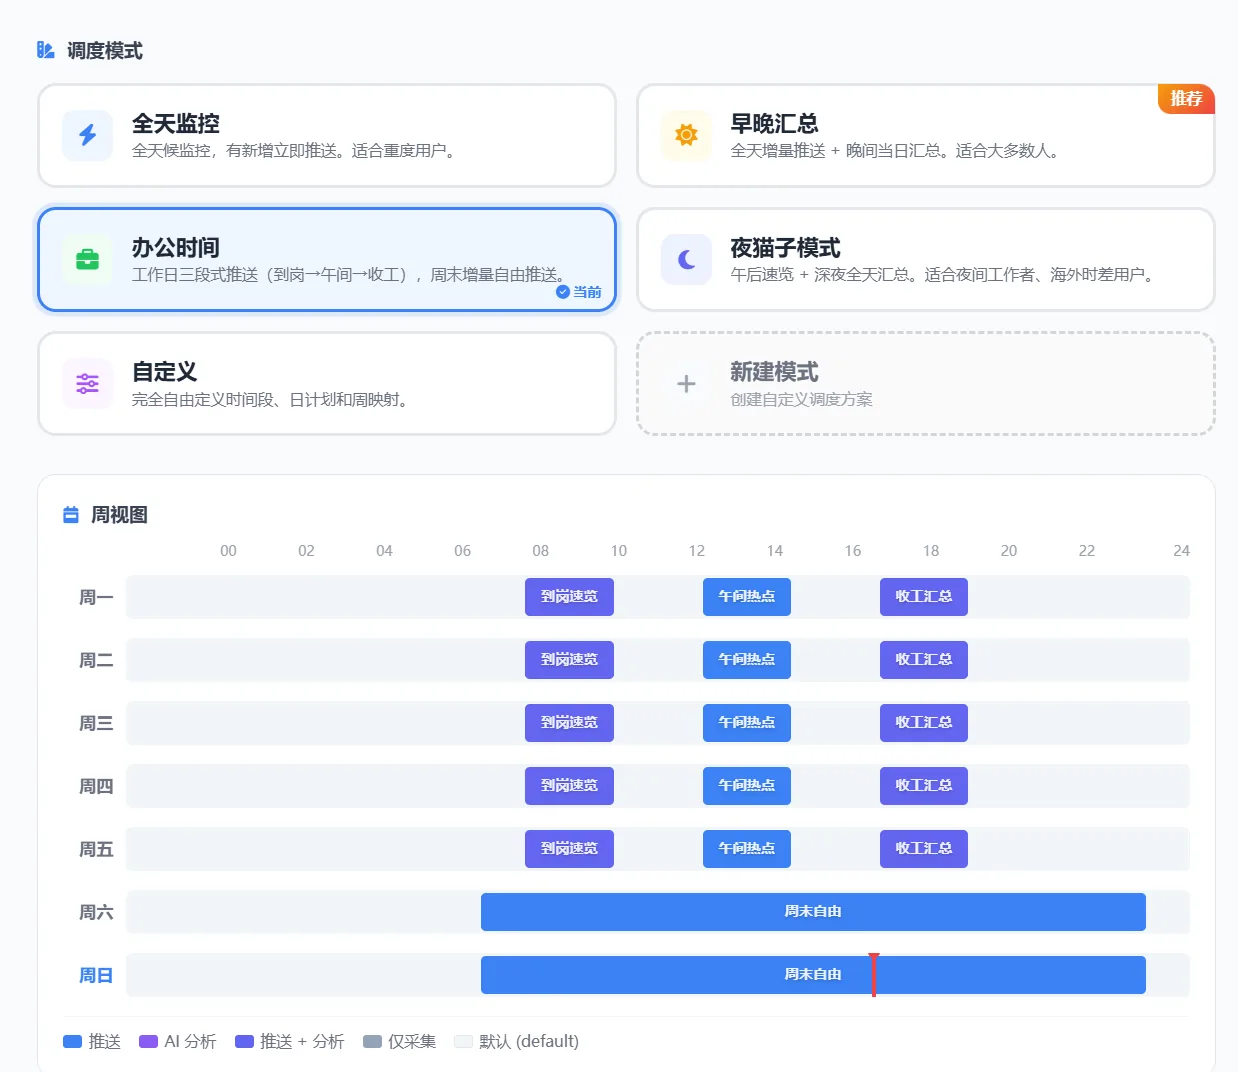
- Preset selection: preset scheduling plans are shown as cards — click to apply
- Week view: a 7 x 24 timeline bar chart that clearly shows each day's task schedule, with different colors marking the status of different task types such as push, analysis, and collection
- Interactive controls: adjust the tasks for each time slot using switches, dropdowns, time pickers, and similar controls
- Day mapping: apply a configuration to specific days of the week
frequency_words.txt -- Keyword configuration
Edit keyword groups visually, with preview and highlighting support for the following advanced syntax:
- + Required word -- the title must contain this keyword
- ! Excluded word -- exclude news that contains this keyword
- @ Count limit -- limit the maximum number of matches for this keyword group
- => Alias -- set a display alias for a keyword
- /.../i Regular expression -- use regex syntax for flexible matching
The editor previews matching behavior in real time, helping you confirm the configuration's effect before exporting.
How to use it
Follow these steps to change your configuration with the visual editor:
Open the editor
Open the editor page in your browser. You can use the online version directly, or open the project's
docs/index.html file locally.Change the configuration
Make the configuration changes you need in the visual interface. Everything happens locally in your browser and is not uploaded to any server.
Export the config file
When you're done, click the export button to download the generated config file. The editor produces file content in the correct format based on your settings.
Replace the config in the project
Copy the exported file into the project's
config/ directory, overwriting the corresponding original file.Restart the service to apply the configuration
Restart the service according to your deployment method so the new configuration takes effect:
# Docker deployment
docker compose up -d

# Local deployment
# Stop the currently running program, then start it again
Tip
Everything you do in the editor happens locally in your browser, and your configuration data is never sent to any remote server. You can safely edit configurations that contain sensitive information.